Using Tags
- Display tags
- Add tags to the system and associate them to a case
- Build a list of tags
- Create a tag on the fly
- Edit tags
- Use the Case Summary tab
- Delete tags
Use Tags to mark cases so they can easily be found for further analysis.
For example:
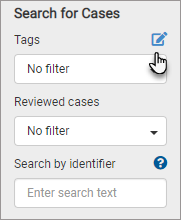
- Create a Unit 12 tag and apply it to cases that were handled by Unit 12.
-
- Click Search.
- The search result displays the cases with the associated Unit 12 Tag.
Note: What's the difference between tags and auto-tag?
-
Tags: Creates a tag with a name of your choice and assigns it to a case as an identifier. The tag name can then be used to search for tagged cases. Tags offer a simple way to organize and group related cases.
-
Auto-tag: Creates a saved search and assigns it a tag name. When newly uploaded cases match the search criteria, CaseReview will automatically tag them with the specified name.
Display tags
A list of tags displays.
Add tags to the system and associate them to a case
There are a couple of ways to add tags:
- Create a list of tags that you can associate with any claim
- Create a tag on the fly while you are reviewing a claim
Once created, tags can be re-used for as many claims as you wish.
Build a list of tags
If there are specific attribute types (events, vitals, waveforms, regions, etc.) you want to monitor, save time by creating a list of tags in advance. Once created, you can associate these tags with as many cases as needed.
-
-
The Tags page displays a list of existing tags. To create a new one, click Add Tag in the upper-right corner of the page.
- Type the tag name and then click Save.
Associate existing tags to a case
-
- Click the case start time on the line of the targeted case.
- On the Case Details page, click Add tag.
- In the "Add tag" window, enter the first letter of the tag name and then select the tag from the list. The tag is now associated with the case you are viewing.
Create a tag on the fly
If you are in a case and want to apply a tag but the tag does not display in the list, create one on the fly. Tags created this way will automatically be associated with the case you are viewing and be available later for general use.
-
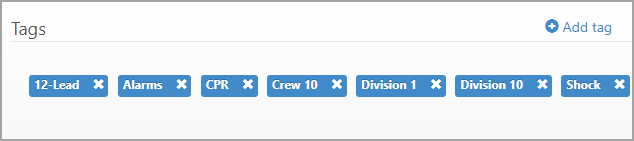
- On the Case Summary tab, look to the right and find the Tags box. In the Tags box, click 'Add tag'.
- In the ‘Add tag’ window, enter a new name.
- Click Save. The new tag is now associated with the case you are viewing and will be available to use on other claims.
Edit tags
-
- Find and click the name of the tag.
- Modify the tag name and click Save.
Use the Case Summary tab
-
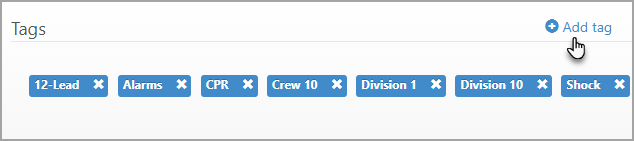
- In the Tags section, click the tag name.
- Modify the tag name and click Save.
Delete tags
-
- Click the X next to the name of the tag you want to delete.
-
Deleting a tag will remove its association with all linked cases. To help you make an informed decision, the system displays the number of associated cases before deletion. If you still wish to proceed, click Delete.